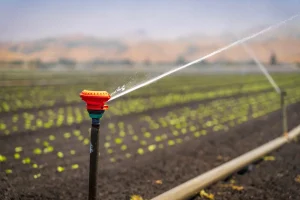
To learn how to make a drip irrigation system, start with crop water needs, flow, pressure, filtration, and layout. A good system delivers water slowly near the root zone. It also keeps pressure balanced from the first plant to the last. In practice, the best design depends on soil texture, water quality, crop spacing, slope, and available water volume.
Table of Contents
- What a Drip Irrigation System Must Do
- Planning Before You Make a Drip Irrigation System
- Choosing Components for Drip Irrigation Lines
- How to Make a Drip Irrigation System Step by Step
- Field Testing After Installing Drip Irrigation
- Automation and Fertigation for Drip Irrigation Systems
- Maintenance for a Long-Lasting Drip Irrigation System
- Common Mistakes When Building Drip Irrigation
- Frequently Asked Questions
What a Drip Irrigation System Must Do
A drip system must match the crop and the water source. It should deliver enough water during peak demand, not only during mild weather. Also, it must handle normal pressure changes without starving distant laterals. When growers ask how to make a drip irrigation system, the answer starts with hydraulics, not tubing alone.
First, define the wetted area that each plant needs. Vegetables often use close emitter spacing. Orchards may need one or more laterals per tree row. Meanwhile, greenhouse crops may need drippers placed at each pot or slab. Soil texture matters because sandy soils spread water less sideways than clay loam.
A simple drip irrigation system still needs a filter, pressure control, flushing points, and a layout that serves each plant evenly. Without those parts, small particles may clog emitters. As a result, the field can look watered while some roots stay dry. That risk grows when water comes from wells, reservoirs, canals, or recycled sources.
The main functions should stay clear before buying parts. Use this checklist to set the design target.
- Deliver water near the active root zone.
- Maintain suitable pressure at each operating zone.
- Filter particles before water reaches emitters.
- Allow flushing at mainlines, submains, and laterals.
- Separate zones when flow demand exceeds supply.
- Support future fertigation only when chemistry allows it.
| Design Factor | Why It Matters | Field Check |
|---|---|---|
| Crop spacing | Sets lateral and emitter placement | Measure row and plant spacing |
| Soil texture | Controls water spread | Test infiltration and wetting pattern |
| Water source | Affects filtration and pump sizing | Check flow, pressure, and debris |
| Field slope | Changes pressure along lines | Survey high and low points |
| Zone size | Controls total flow demand | Add emitter flow by zone |
Planning Before You Make a Drip Irrigation System
Planning decides whether the system works under real field conditions. Start with a scaled sketch of the plot. Then mark the water source, crop rows, access roads, valves, and high points. Growers often ask how to set up drip irrigation after choosing a pump, yet the correct order starts with water demand.
To estimate demand, multiply the number of emitters by the emitter flow rate. Next, compare that flow with the available pump and supply capacity. If demand exceeds supply, divide the field into zones. In contrast, oversized zones may cause low pressure, uneven discharge, and weak flushing at the line ends.
Map the Crop Rows and Water Source
A clear map reduces mistakes during pipe cutting and trenching. Mark row length, row direction, and each planned valve location. Also, note any sharp slopes or low areas. When you study how to make a drip irrigation system, this map becomes the base for every material choice.
For orchards, show tree age and canopy size. For vegetables, show bed width and row count and for greenhouses, show benches, gutters, or plant containers. Then, place mainlines where they avoid repeated traffic. This step protects pipes and keeps later repairs easier.
Check Flow, Pressure, and Water Quality
Measure static pressure and operating pressure at the source. Then run a flow test for the expected irrigation duration. Pressure can look acceptable when no water moves. Even so, it may fall sharply when all emitters operate. A reliable design uses working pressure, not static pressure alone.
Water quality also shapes the design. Sand, algae, iron, calcium, and organic matter can clog emitters. For example, surface reservoirs often need stronger filtration than clean groundwater. If fertigation will occur, test EC, pH, and chemical compatibility. Local agronomic advice should support final nutrient decisions.
Use these planning steps before installation begins.
- Sketch the field, greenhouse, or garden at a practical scale.
- Record crop spacing, row length, and elevation changes.
- Measure source flow under realistic operating conditions.
- Test water quality for suspended solids and chemistry risks.
- Divide the area into zones when total demand is too high.
- Confirm pipe sizes against manufacturer pressure and flow tables.
Choosing Components for Drip Irrigation Lines
A DIY drip irrigation system can work well in a garden, orchard block, or greenhouse bench when the design stays within hydraulic limits. Still, farms need stronger planning because longer runs amplify pressure loss. Component quality also matters. Cheap fittings may leak, and low-grade emitters may vary widely in discharge.
The main components include a pump or pressurized source, filter, pressure regulator, mainline, submain, valves, laterals, emitters, and flush valves. Also, many systems need air release valves and check valves. These parts protect the network during start-up, shutdown, and fertigation. Never assume all fittings share the same pressure rating.
Filters, Regulators, Valves, and Fittings
Filtration protects the smallest water passages in the system. Screen filters suit many clean sources. Disc filters often handle organic particles better. Media filters may fit surface water with higher organic load. However, the correct choice depends on water analysis, emitter requirements, and flow rate.
Pressure regulators keep emitters within their operating range. In practice, they perform best when placed after filtration and before zone lines. Valves control irrigation blocks, while fittings create secure connections. Use clamps, gaskets, and adapters that match pipe materials. A mismatch can create leaks under normal pressure.
Emitters, Drip Tape, and Tubing
Emitter selection depends on crop spacing, soil, and irrigation timing. Drip tape often suits seasonal vegetable beds. Heavy-wall tubing usually fits orchards and multi-season use. Meanwhile, online drippers can serve pots, trees, or uneven plant spacing. Pressure-compensating emitters may help on slopes, but verify specifications before selection.
When choosing lateral length, check the manufacturer’s maximum run tables. Those tables consider emitter spacing, flow rate, inlet pressure, and allowed variation. If the row is too long, split it from both ends or create smaller zones. This decision often separates strong designs from weak ones.
| Component | Common Role | Selection Note |
|---|---|---|
| Pump | Provides flow and pressure | Match operating demand |
| Filter | Removes clogging particles | Size by water source |
| Regulator | Controls working pressure | Check emitter range |
| Mainline | Carries water to zones | Limit friction loss |
| Lateral | Feeds emitters | Respect run length |
| Flush valve | Removes sediment | Place at low or end points |
How to Make a Drip Irrigation System Step by Step
The practical process follows a clear order. Build the source assembly first. Then install mainlines, valves, and laterals. After that, flush the network before connecting or closing emitters. When planning how to make a drip irrigation system, allow time for testing before planting reaches peak water demand.
Use clean cuts and correct tools. Avoid crushing tubing with dull blades. Also, keep open pipe ends out of soil during assembly. Small debris can enter the system during construction. Later, that debris may clog emitters even when the filter works well.
A typical installation sequence works best when each step stays organized.
- Install the pump connection, backflow protection, filter, regulator, and pressure gauge.
- Lay the mainline along the planned route with minimal sharp bends.
- Install zone valves where operators can reach them safely.
- Connect submains and laterals with compatible fittings and gaskets.
- Punch emitter holes only where plant spacing requires them.
- Flush mainlines and laterals before closing the line ends.
- Pressurize one zone at a time and inspect every connection.
- Record pressure at the inlet, middle, and far end of each zone.
Prepare the Header and Mainline
The header assembly sets the performance of the whole system. Place filtration where operators can clean it easily. Next, add pressure gauges before and after the filter. A pressure difference can show clogging. Also, include valves that isolate parts of the system for maintenance.
Mainlines should follow routes that reduce friction loss and physical damage. Burying may protect permanent pipes from sunlight and traffic. In contrast, temporary systems may stay above ground for seasonal movement. Good drip irrigation installation also protects the pipe from sharp bends, heat damage, and traffic from tractors or carts.
Lay Laterals and Flush the Network
Lay laterals straight beside the crop row or root zone. Secure them enough to prevent movement, but avoid stretching them tight. When crews learn how to install a drip line, they should focus on straight runs, clean cuts, and secure connections. Small errors can create leaks later.
Before closing line ends, run water through each lateral. This flushes dust, soil, and plastic shavings from installation. Then close the ends with removable caps or valves. Removable closures make future flushing easier. Finally, operate each zone and watch the wetting pattern near plants.
Field Testing After Installing Drip Irrigation
Testing shows whether the design matches field reality. Start with pressure readings at the head unit, zone inlet, and farthest lateral end. Then compare those readings with emitter specifications. If pressure falls too much, reduce zone size, improve pipe sizing, or adjust the layout.
Emitter flow testing gives better evidence than visual checks alone. Collect discharge from several emitters for a fixed time. Choose points near the inlet, middle, and end. Next, compare the volumes. Wide differences may signal low pressure, clogging, excessive lateral length, or damaged tubing.
When reviewing how to make a drip irrigation system, include a test period under normal operating conditions. Run the system long enough to see the wetting pattern. Then dig small observation holes near roots. The goal is moist soil where roots feed, not surface wetness alone.
Use these checks before relying on the system for routine irrigation.
- Check pressure at several points while the zone operates.
- Compare emitter discharge at near, middle, and far locations.
- Inspect fittings for leaks after pressure stabilizes.
- Flush line ends until water runs clear.
- Confirm that wetting patterns match the crop root zone.
- Record settings, readings, and maintenance dates for future reference.
Automation and Fertigation for Drip Irrigation Systems
Automation can improve timing and consistency when the base system is sound. Controllers can open valves by schedule, sensor input, or remote command. Also, soil moisture sensors can support better decisions. Still, sensors need correct placement and field calibration. Poor placement can mislead even advanced controllers.
Fertigation adds nutrients through irrigation water. It requires safe injection, mixing, filtration, and chemical compatibility checks. In practice, injection equipment should match flow rate, pressure, and crop program. Growers should never mix fertilizers without checking solubility and reaction risks. Precipitation can clog emitters quickly.
Güneysu Teknik Support for Smart Drip Irrigation
Güneysu Teknik designs and installs irrigation, fertigation, filtration, and water storage systems across Turkey. Our company also supports growers who need practical automation, reservoir integration, and project installation. Because every farm differs, site measurements should guide each final design.
For larger or more technical projects, Netafim solutions may fit certain requirements. Systems such as NetaJet 4G, NetaFlex 3G, GrowSphere MAX with FertiKit 5G, and FertiOne can support fertigation or automation needs when specified correctly. However, product selection must follow crop, water, and operating data.
A grower studying how to make a drip irrigation system should decide early whether automation will come later. Extra conduits, valve boxes, and sensor locations cost less effort during the initial build. As a result, future upgrades become cleaner and less disruptive.
Maintenance for a Long-Lasting Drip Irrigation System
Maintenance keeps performance stable over seasons. Clean filters on a schedule based on pressure difference, not guesswork. Then flush mainlines and laterals at planned intervals. Also, inspect emitters after fertigation or dirty water events. A small clogging problem can spread if operators ignore early signs.
Chemical maintenance depends on water analysis. Acid treatment, chlorination, or other cleaning methods may help in specific cases. Even so, they require careful dosing, safety practices, and compatibility checks. Consult qualified agronomic or technical support before chemical treatment. Wrong treatment can damage equipment or crops.
When growers keep records, they make better decisions. Record irrigation time, pressure readings, filter cleaning, fertilizer injections, and repairs. Over time, those notes reveal patterns. For example, repeated clogging after reservoir filling may point to sediment entry or algae growth.
The following schedule gives a practical starting point. Adjust it for water quality, crop value, and operating hours.
| Task | Typical Timing | Reason |
|---|---|---|
| Check pressure gauges | Each irrigation day | Spot leaks or clogging |
| Clean filters | As pressure difference rises | Protect emitters |
| Flush laterals | Regularly by water quality | Remove sediment |
| Inspect emitters | During crop walks | Find dry plants early |
| Review records | Weekly in season | Catch operating changes |
| Winterize exposed parts | Before freezing risk | Reduce breakage |
Common Mistakes When Building Drip Irrigation
Many problems start with guessing. Guessing flow rate, pressure, or row length often leads to uneven watering. Instead, measure the source and design each zone. Another common error is skipping filtration because the water looks clean. Fine particles can still block emitter passages.
Overlong laterals create another frequent issue. Water loses pressure as it travels through pipe and emitters. Consequently, far-end plants may receive less water. If the field has slope, pressure differences can become stronger. Use pressure-compensating products or shorter zones when specifications require them.
A final mistake involves fertigation without chemistry checks. Fertilizers can react with minerals in water. Then solids form and clog the system. When learning how to make a drip irrigation system, treat fertigation as an engineered process. It is not just a fertilizer tank connected to a pipe.
Avoid these practical problems during design and operation.
- Avoid sizing zones without measured source flow.
- Avoid installing emitters before flushing new pipes.
- Avoid mixing fertilizers without compatibility checks.
- Avoid running laterals beyond manufacturer limits.
- Avoid ignoring pressure readings at far-end locations.
- Avoid burying fittings where future service becomes difficult.
Frequently Asked Questions
What Is the First Step in Building a Drip System?
Start by measuring water flow, pressure, and crop spacing. Then design zones that match the available supply.
Can I Use Drip Irrigation With Well Water?
Yes, but test the water first. Sand, iron, calcium, and pH can affect filtration and maintenance.
How Often Should I Flush Drip Lines?
Flush lines based on water quality and operating hours. Dirty surface water usually needs more frequent flushing.
Do I Need a Pressure Regulator?
Most drip systems need pressure control. Emitters work best within the pressure range listed by the manufacturer.
Can Fertilizer Go Through the Drip System?
Yes, when the system includes proper injection and filtration. Always check fertilizer solubility and water chemistry first.
Should Drip Lines Be Buried or Left on the Surface?
Both options can work. The best choice depends on crop type, season length, traffic, soil work, and maintenance access.
Why Are Some Plants Still Dry?
Possible causes include clogged emitters, low pressure, poor spacing, or uneven soil wetting. Check pressure and emitter discharge first.
Can One Zone Water the Whole Field?
Only if the water source can supply the full flow demand. Larger areas usually need multiple zones.