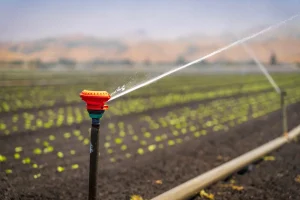
Start with a measured layout, a clean water source, pressure control, filtration, mainline tubing, drip laterals, emitters, and a careful flushing test. That is the practical answer to how to install garden drip irrigation. A good system waters the root zone slowly and evenly. It also keeps leaves drier, reduces runoff, and makes irrigation easier to repeat.
Table of Contents
- Plan a Garden Drip Irrigation Layout Before You Dig
- Choose Parts to Install Garden Drip Irrigation Correctly
- Build the Garden Drip Irrigation Header Assembly
- Place Drip Lines and Emitters in the Garden
- Step-by-Step Garden Drip Irrigation Installation
- Connect and Test Your Garden Drip Irrigation System
- Operate and Maintain Garden Drip Irrigation Through the Season
- Adapt Drip Irrigation for Beds, Pots, Trees, and Slopes
- Use Automation, Fertigation, and Water Storage Wisely
- How Güneysu Teknik Supports Garden Drip Irrigation Projects
- Common Mistakes to Avoid With Garden Drip Irrigation
- Frequently Asked Questions
Plan a Garden Drip Irrigation Layout Before You Dig
A reliable layout starts with a simple drawing. First, mark beds, paths, trees, pots, hose bibs, and water storage points. Then measure each row length and note elevation changes. This step helps you size tubing and avoid weak flow at the far end. In practice, the best design follows plant spacing, not just the edge of the bed.
Group plants by water demand whenever possible. For example, tomatoes, peppers, and cucumbers may need different runtimes than herbs. Similarly, young seedlings need gentler watering than mature fruiting plants. If one valve feeds unlike crops, some plants may stay too wet while others struggle. Good zoning makes how to install garden drip irrigation much easier to manage later.
Check your water source before buying parts. A faucet, tank, well, or reservoir can all work, but each source brings different risks. Well water may contain sand. Stored water may contain algae. Municipal water may have stable pressure, yet it still needs backflow protection. As a result, filtration and pressure regulation matter from the start.
Measure Flow and Pressure at the Source
Measure flow with a bucket and timer. Then compare that flow with the total emitter demand. Also check pressure while water runs, not only when the valve is closed. Static pressure can mislead you. Drip systems usually need controlled pressure, and actual requirements depend on tubing and emitter specifications.
Map Zones by Crop Need
Draw each irrigation zone with a different color. Next, keep high-demand vegetables separate from drought-tolerant herbs. Raised beds often need shorter laterals than long field rows. Meanwhile, pots dry faster than ground soil. This simple map prevents guesswork during assembly and future repairs.
Choose Parts to Install Garden Drip Irrigation Correctly
Component selection decides how well the system performs. A small garden can use a faucet connection kit, filter, pressure regulator, mainline tubing, barbed fittings, drip tubing, and end caps. Larger gardens may need valves, manifolds, air release points, and flush valves. Still, every part should match the manufacturer pressure and flow limits.
Use tubing sizes that fit the garden scale. A typical mainline carries water from the source to each bed. A garden drip line then carries water beside plants. Drip tubing with built-in emitters works well for regular row spacing. Button emitters or adjustable emitters work better where plant spacing varies.
Filtration deserves special care. Screen filters catch mineral particles and sand. Disc filters handle mixed organic and mineral debris well. For stored water, inspect algae risk before choosing filter type. Therefore, do not skip a filter just because the system looks small. A single clogged emitter can stress nearby plants.
| Component | Purpose | Selection Note |
|---|---|---|
| Backflow preventer | Protects water supply | Use where required |
| Filter | Removes particles | Match water quality |
| Pressure regulator | Controls pressure | Verify tubing range |
| Mainline tubing | Feeds zones | Size by flow |
| Drip tubing | Waters rows | Match plant spacing |
| Flush valve | Clears debris | Place at line ends |
Select Tubing That Matches Plant Spacing
Emitter spacing should follow the crop and soil. Sandy soil spreads water less sideways, so closer spacing may help. Clay soil spreads water wider, but it drains slower. In contrast, loam often allows moderate spacing. Always verify wetting patterns with a test run before final mulching.
Match Filters to Water Quality
A clean city faucet may only need a compact screen filter. However, tank or pond water often needs stronger filtration. Flush the filter often during the first weeks. Then adjust the cleaning interval after you see real debris levels. This habit protects emitters and keeps irrigation uniform.
Build the Garden Drip Irrigation Header Assembly
The header assembly controls safety, pressure, and water quality. Install parts in a logical order after the faucet or supply valve. First, add a backflow preventer if the source connects to potable water. Next, install a filter, then a pressure regulator, and then the mainline adapter. Some setups also need a timer after the backflow device.
When learning how to install garden drip irrigation, many mistakes happen at the header. For instance, installing the regulator before the filter can expose it to grit. Also, forcing mismatched threads can cause leaks. Use fittings from compatible product lines when possible. If you mix brands, verify thread type and tubing diameter.
Do not bury the header where you cannot inspect it. Instead, mount it near the water source and protect it from sun damage. A simple valve box can help, but it must drain well. Meanwhile, leave room to unscrew the filter bowl. Maintenance access saves time during the growing season.
Use Backflow Protection Correctly
Backflow prevention helps protect drinking water from fertilizer, soil water, and microbes. Local plumbing rules may vary, especially where fertigation enters the system. Therefore, check local requirements before connecting any injector. In garden systems, safety should come before convenience.
Control Pressure Before Water Reaches Emitters
High pressure can pop fittings and create uneven flow. Low pressure can leave far emitters weak. Use a regulator rated for the flow range of the zone. Then test pressure while the zone operates. This operating test gives better information than a closed-line reading.
Place Drip Lines and Emitters in the Garden
Place drip lines close to roots, not in the middle of walkways. For straight vegetable rows, run one or two laterals along each row. For wide beds, use several parallel lines. Also keep lines visible until testing ends. Once the pattern looks correct, mulch can protect tubing and stabilize soil moisture.
Garden emitter placement depends on crop spacing, root depth, and soil texture. For example, a tomato may use emitters near both sides of the root zone. Lettuce rows often work better with closer, lower-flow outlets. In contrast, a young fruit tree may need emitters around the canopy drip area, then wider spacing as it grows.
If you want how to install garden drip irrigation to work beyond the first week, leave space for maintenance. End caps should be reachable. Flush points should open away from plant crowns. Sharp bends should be avoided because they restrict flow. Instead, use elbows or gentler curves around corners.
Space Lines for Soil Wetting Patterns
Run the system long enough to see the wetting pattern. Then dig a small check hole beside a plant. The wet zone should reach active roots without saturating the surface for hours. Sandy beds may need more frequent short cycles. Clay beds may need slower, longer intervals with careful monitoring.
Keep Emitters Clear of Mulch Blockage
Mulch helps reduce evaporation, yet it can hide problems. Place emitters so water exits freely. Also avoid burying non-rated tubing under heavy soil. If you need subsurface installation, use products designed for that purpose. Root intrusion protection and flushing become more important underground.
Step-by-Step Garden Drip Irrigation Installation
A careful sequence keeps installation clean and repeatable. Before cutting tubing, unroll it in the sun for easier handling. Then confirm the layout against your measurements. This is the point where garden drip irrigation installation becomes practical work instead of planning. Keep spare couplers nearby for changes and repairs.
- Shut off the water source before assembling the header.
- Install the backflow preventer, filter, pressure regulator, and adapter.
- Lay the mainline along the planned route without burying it.
- Cut laterals to length with a clean tubing cutter.
- Punch holes only where fittings or emitters will be installed.
- Connect drip laterals to the mainline with secure barbed fittings.
- Cap or valve the end of each lateral for flushing.
- Open the zone slowly and flush debris from every line.
- Close the line ends and check each emitter for steady discharge.
Use clean cuts and steady hand pressure. A jagged cut can leak at fittings. Also avoid stretching tubing to reach a connection. Heat, pressure, and movement can pull stressed tubing loose. If a line falls short, add a proper coupling rather than forcing the layout.
People often learn how to install garden drip irrigation by trial and correction. That said, careful preparation reduces rework. Keep each bed labeled if several zones meet at one manifold. Also take photos before adding mulch. Later, those photos help locate hidden fittings quickly.
Cut, Punch, and Connect With Care
Use a punch sized for the fittings. Oversized holes may leak even if the fitting feels tight. Meanwhile, undersized holes can split tubing during insertion. Wetting the barb with clean water can help. Do not use oils or chemicals that may damage plastic.
Flush Before Final Capping
Flushing removes plastic shavings, soil, and grit. Open the line ends before you run emitters under pressure. Then close one end at a time and inspect flow. This short step prevents many early clogging complaints. It also confirms that water reaches the farthest point.
Connect and Test Your Garden Drip Irrigation System
Testing turns a good layout into a dependable system. Start with one zone only. Open water slowly and watch the header first. Then walk every lateral. Look for popped fittings, pinhole sprays, kinked tubing, and dry outlets. Small leaks matter because they reduce pressure at the end of the line.
Measure how long water takes to wet the root zone. A surface spot does not tell the full story. Instead, check moisture below the mulch and near active roots. For example, a raised bed may reach target depth faster than a deep tree basin. Adjust runtime based on soil checks, not guesswork.
If you are building a DIY garden drip irrigation system, do not skip a written record. Note zone length, emitter type, pressure setting, and normal runtime. Also record filter cleaning dates. Later, when plants change or lines move, those notes make troubleshooting faster and more accurate.
Check Uniformity Across the Zone
Compare emitters near the source and at the far end. They should drip at similar rates within the product design range. If far emitters look weak, reduce zone length or split the zone. Also check for clogged filters and partially closed valves.
Set an Initial Runtime
Start with a conservative runtime, then inspect soil moisture. Increase or decrease minutes based on root depth and weather. During cool weeks, plants usually need less water. During hot, windy periods, they may need more. Local soil and crop stage should guide each change.
Operate and Maintain Garden Drip Irrigation Through the Season
Operation changes with weather, plant size, and soil condition. Early in the season, roots sit close to the transplant. Later, roots expand and demand rises. As a result, one fixed schedule rarely fits every month. Adjust timing after checking soil moisture, plant response, and weather forecasts.
Maintenance should follow a routine. First, clean filters before pressure drops. Next, flush line ends after repairs or fertilizer use. Then inspect emitters after dusty wind, cultivation, or animal damage. If you know how to install garden drip irrigation, you also know where weak points usually appear.
Watch for salt buildup in dry climates or protected growing areas. Drip irrigation wets a focused zone, so salts can move toward the edge of the wetted area. Periodic leaching may be needed where water salinity is high. However, leaching decisions should reflect soil tests, crop tolerance, and drainage.
| Task | Typical Timing | Why It Matters |
|---|---|---|
| Clean filter | Weekly or as needed | Protects emitters |
| Flush line ends | After repairs | Removes debris |
| Inspect fittings | Every few weeks | Finds leaks early |
| Check wetting depth | After schedule changes | Confirms root watering |
| Review pressure | At startup | Verifies operating range |
Manage Clogging Risks
Clogging can come from sand, algae, minerals, or fertilizer residue. Use filtration that matches the source. Also flush after installing new tubing. If fertigation enters the system, clean the injection equipment and lines afterward. Follow product labels and local rules for any agricultural input.
Protect Tubing From Damage
Garden tools, rodents, sun, and foot traffic can damage tubing. Keep lines out of paths where possible. Also pin tubing gently without crushing it. At season end, drain exposed lines in freezing areas. Store removable parts away from sunlight and sharp objects.
Adapt Drip Irrigation for Beds, Pots, Trees, and Slopes
Different planting areas need different details. Raised beds often use parallel laterals across the bed width. Pots may need small individual emitters connected by microtubing. Trees and shrubs usually need a wider wetting pattern as roots expand. Therefore, copy the principles, not one rigid layout.
Slopes need special attention. Water pressure increases downhill and drops uphill. Pressure-compensating emitters may help when elevation changes are significant. Also run laterals along the contour when possible. In contrast, lines running straight downhill may overwater low plants and underwater upper plants.
When laying garden irrigation pipes, avoid tight routes around roots, rocks, and bed frames. Gentle paths reduce stress on fittings. Also separate irrigation lines from areas that receive frequent digging. If you rotate crops, leave extra connection points capped for future rows.
Raised Beds and Vegetable Rows
Raised beds dry quickly at the edges. Place lines so corners and edges receive enough moisture. For closely planted greens, several evenly spaced laterals often work better than one central line. Meanwhile, tall crops may need water near both sides of the row.
Containers and Small Garden Zones
Containers have limited root volume and fast drainage. Use small emitters and test runoff carefully. Too much water can flush nutrients from potting mix. Too little water can leave dry pockets. Check pots by weight and soil feel until the schedule stabilizes.
Use Automation, Fertigation, and Water Storage Wisely
Automation can improve consistency when it matches the garden. A simple timer can handle routine watering. Soil moisture sensors can add useful feedback. Smart controllers may adjust schedules based on weather data. Still, every automated system needs field checks because blocked emitters and leaks can still occur.
Fertigation adds nutrients through the irrigation line. It can work well, but it raises safety and maintenance needs. Use proper backflow protection and compatible injectors. Also confirm fertilizer solubility and crop requirements. After injection, run clean water long enough to clear the system.
Water storage can help where supply timing is limited. A tank or reservoir allows irrigation at suitable times. However, stored water often needs stronger filtration because algae and sediment can build up. Cover tanks where appropriate, and inspect strainers often. This protects emitters and improves reliability.
Decide When a Timer Makes Sense
A timer helps when watering times are easy to predict. It also supports early morning irrigation. Even so, inspect the garden often after schedule changes. A timer cannot see a cracked fitting. It also cannot judge root health without sensor data and field checks.
Add Fertilizer Only With Proper Protection
Never connect fertilizer equipment without backflow safeguards. Fertilizer can contaminate supply lines if pressure reverses. Also follow label directions and local rules. In small gardens, hand feeding may sometimes be simpler. For larger projects, engineered fertigation can improve control when managed correctly.
How Güneysu Teknik Supports Garden Drip Irrigation Projects
Güneysu Teknik supports growers, greenhouse operators, orchards, field producers, and garden projects with practical irrigation planning. Güneysu Teknik can evaluate water source, filtration needs, pressure control, storage, fertigation, and installation details. The right recommendation depends on crop type, soil, climate, and available water. No single drip layout suits every site.
For larger gardens and commercial production in Turkey, professional design can reduce avoidable errors. Engineers can calculate zone flow, select filters, plan manifolds, and size storage. They can also coordinate drip irrigation with sprinkler, micro-sprinkler, or automation systems. For some projects, Netafim products may fit the design when specifications match the site.
Knowing how to install garden drip irrigation helps owners discuss details with installers. Clear measurements, crop plans, and water tests improve decisions. Also share future expansion plans before installation begins. A system that starts simple can still allow extra zones, sensors, or fertigation later.
When Professional Design Is Worth Considering
Professional support helps when gardens have long runs, slopes, poor water quality, or multiple crop groups. It also helps where fertigation or tanks are involved. In those cases, small mistakes can affect many plants. A site-specific plan reduces guesswork during installation.
What to Prepare Before a Site Visit
Prepare a sketch, water source details, crop list, and bed dimensions. Also note power access and storage options. If possible, collect basic water quality information. These details help the designer choose filtration, pressure control, and zoning more accurately.
Common Mistakes to Avoid With Garden Drip Irrigation
Most drip problems come from rushed planning, poor filtration, excessive zone length, or weak maintenance. For example, many gardeners connect too many laterals to one faucet. Then pressure drops at the end. Others bury fittings before testing. As a result, a small leak becomes hard to find.
Avoid mixing parts without checking compatibility. Tubing may look similar, yet inside diameter and wall thickness can differ. Barbed fittings need the correct fit. Also, regulators and filters have flow ranges. If flow falls outside those ranges, performance may suffer.
Do not assume more water means better growth. Roots need oxygen as well as moisture. Overwatering can encourage disease and nutrient leaching. Instead, match runtime to soil and crop needs. If you understand how to install garden drip irrigation, you can also adjust it responsibly.
- Using no filter on sandy or stored water
- Running laterals beyond the recommended length
- Skipping pressure regulation at the header
- Hiding leaks under mulch before testing
- Placing emitters away from active roots
- Ignoring seasonal changes in plant water demand
- Forgetting to flush lines after installation
Fix Leaks Before Adjusting Runtime
A leak can make plants near the break too wet and far plants too dry. Fix the leak first. Then retest pressure and wetting depth. Changing runtime before repairs can hide the real problem.
Do Not Let Convenience Override Crop Needs
One valve for the whole garden may look simple. Still, unlike crops often need different schedules. Split zones when plant needs differ strongly. This choice improves control and simplifies seasonal adjustments.
Frequently Asked Questions
How Deep Should Drip Lines Be in a Garden?
Most garden drip lines sit on the soil surface under mulch. If you bury tubing, use products rated for subsurface use. Keep flush points accessible.
Do I Need a Pressure Regulator?
Yes, most drip systems need pressure regulation. The correct setting depends on tubing and emitter specifications. Test pressure while the zone runs.
Can I Connect Drip Irrigation to a Hose Faucet?
Yes, many small gardens use a hose faucet. Add backflow protection, filtration, and pressure regulation. Confirm that the faucet flow can support the zone.
How Often Should I Clean the Filter?
Clean it weekly at first. Then adjust the interval after you see debris levels. Stored or sandy water usually needs more frequent cleaning.
Why Are Some Emitters Not Dripping?
They may be clogged, under-pressurized, or installed on an overloaded zone. Flush the line and clean the filter first. Then check pressure and zone length.
Can Drip Irrigation Work on a Slope?
Yes, but the layout needs care. Run lines along contours when possible. Pressure-compensating emitters may help with elevation changes.
Should I Use a Timer?
A timer can improve consistency. Still, check soil moisture and inspect lines regularly. Automation does not replace maintenance.
Can I Add Fertilizer Through the System?
Yes, with proper equipment and backflow protection. Confirm fertilizer compatibility and follow label directions. Flush the system with clean water afterward.