A successful drip irrigation system installation starts with accurate field data, correct hydraulic design, and careful assembly. The goal is simple. Each plant should receive water at the planned rate, pressure, and timing. In practice, that depends on soil texture, crop spacing, filtration, pipe sizing, and operating pressure. A strong installation also allows safe fertigation, easy flushing, and routine maintenance without disrupting farm work.
Table of Contents
- How Drip Irrigation System Installation Works
- Site Assessment Before Drip Irrigation Installation
- Design Choices for Efficient Drip Irrigation Systems
- Filtration and Fertigation in a Drip Irrigation Setup
- Step-by-Step Drip Irrigation System Installation Process
- Drip Line Installation and Pipe Layout Details
- Testing Drip Irrigation System Connections
- Operation, Maintenance, and Troubleshooting
- Güneysu Teknik Support for Drip Irrigation Projects
- Frequently Asked Questions
How Drip Irrigation System Installation Works
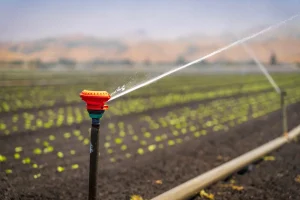
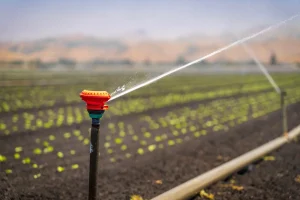
Drip irrigation delivers water through emitters near the root zone. First, water moves from a source through pumps, filters, valves, mains, submains, and laterals. Then emitters discharge small flows at defined spacing. A good drip irrigation system installation balances all these parts. As a result, the farthest emitter can operate within the intended pressure range.
The system must match the crop and field. For example, a vineyard may need one or two lateral lines per row. In contrast, vegetable beds may need several close lines. Soil also changes the choice. Sandy soil spreads water narrowly, while clay soil spreads it wider. Therefore, emitter spacing and run time need field-specific planning.
Main Components of a Drip Irrigation Installation
Every installation has a water source and a control head. The control head usually includes filtration, valves, pressure regulation, and dosing equipment. Next, mainlines carry flow to zones. Submains feed laterals, and laterals carry the emitters. Finally, flush valves, air release valves, and pressure test points help operators manage the system.
A drip irrigation system installation should never start with pipe alone. Instead, the installer should confirm demand, available flow, and expected pressure. Pump curves, elevation changes, and pipe friction all affect performance. Also, fittings and valves add losses. Small errors can become serious when long laterals or steep slopes enter the design.
Site Assessment Before Drip Irrigation Installation
A field assessment gives the installation its limits. First, measure the plot dimensions, row spacing, row length, and elevation. Then record the water source, flow capacity, and pump condition. A drip irrigation system installation depends on these numbers. Guesswork often causes weak pressure, uneven application, or frequent clogging.
Water quality deserves close attention. For instance, well water may contain sand, iron, or dissolved minerals. Surface water may carry algae, silt, or organic matter. Each problem requires different filtration and maintenance. Still, laboratory analysis gives the best starting point. Check pH, EC, hardness, suspended solids, and biological load before final design.
Soil, Slope, and Crop Data for Drip Irrigation
Soil texture controls wetting patterns and irrigation frequency. In practice, sandy soils often need shorter, more frequent events. Loam soils usually allow longer intervals. Clay soils need careful management to avoid runoff or surface sealing. Crop rooting depth matters as well. Shallow-rooted vegetables need different scheduling than mature orchards.
Slope affects pressure along every pipe run. Uphill sections lose pressure, while downhill sections gain pressure. As a result, pressure-compensating emitters may suit uneven land. A drip irrigation system installation on sloped fields also needs air release points. Vacuum protection can help protect laterals during drainage and shutdown.
| Assessment Item | Why It Matters | Field Check |
|---|---|---|
| Flow rate | Sets zone size | Measure source output |
| Static pressure | Limits pipe design | Check at pump outlet |
| Elevation | Changes emitter pressure | Survey high and low points |
| Water quality | Defines filtration needs | Test pH, EC, solids |
| Row spacing | Controls lateral layout | Measure planted rows |
Design Choices for Efficient Drip Irrigation Systems
Design begins with crop water demand and irrigation blocks. First, group crops with similar needs. Then separate fields by elevation, soil, and operating schedule. A drip irrigation system installation works better when each zone has a realistic flow requirement. Oversized zones may starve pressure. Undersized zones may increase labor and valve cycling.
Emitter selection also shapes performance. For example, low-flow emitters may suit heavy soils or limited water sources. Higher-flow emitters may suit sandy beds or wider plant spacing. That said, the manufacturer’s pressure range must match the field. The design should also consider clogging risk, flushing velocity, and seasonal crop changes.
Pipe Sizing for Drip Irrigation System Installation
Pipe size controls friction loss and operating pressure. In practice, long runs need larger diameters or smaller zones. Mainlines and submains should carry flow without excessive velocity. Laterals need enough pressure at the inlet and end. A drip irrigation system installation should include pressure checks at critical points.
Material choice depends on location and duty. PE pipes suit many agricultural laterals and submains. PVC can suit buried mains when installed correctly. Also, exposed pipes need protection from traffic, heat, and mechanical damage. Fittings should match pipe standards and manufacturer instructions. Mixed materials need compatible connectors and careful sealing.
Filtration and Fertigation in a Drip Irrigation Setup
Filtration protects emitters from particles and organic material. First, match the filter type to the water source. Screen, disc, media, or hydrocyclone filters may serve different conditions. A drip irrigation setup with poor filtration can clog quickly. Therefore, filter selection should follow water analysis, emitter specifications, and expected maintenance capacity.
Fertigation equipment adds nutrients through the irrigation water. In practice, it needs accurate dosing, backflow protection, and chemical compatibility. Tanks, injectors, hydraulic dosing pumps, and automated units can fit different farms. Netafim platforms such as NetaJet 4G, NetaFlex 3G, GrowSphere MAX with FertiKit 5G, and FertiOne may support advanced fertigation when properly specified.
Filtration Rules for Drip Irrigation Installation
The filter rating must suit the emitter passage. Next, the filter capacity must support zone flow. Pressure gauges before and after filters show clogging during operation. When pressure difference rises, cleaning becomes necessary. A drip irrigation system installation should also include safe drain points for filter flushing.
Chemical treatment may help in certain cases. For example, acid treatment can address some mineral deposits. Chlorination can help manage biological growth in some systems. Still, treatment requires water testing and professional handling. Local crop sensitivity, worker safety, and material compatibility must guide every decision.
Step-by-Step Drip Irrigation System Installation Process
A planned sequence reduces leaks and rework. First, mark zones, pipe routes, valve locations, and flush points. Then stage pipes, fittings, valves, filters, and tools near the work area. A drip irrigation assembly should follow the approved design, not field improvisation. Small changes can alter pressure and zone balance.
Installation quality depends on clean cuts, correct fittings, and stable trenches. Also, workers should avoid dragging laterals over sharp stones. A drip irrigation system installation should keep pipe interiors clean. Dirt inside mains or laterals often reaches emitters during first startup. Proper flushing prevents many early service problems.
- Confirm the field layout against the final design.
- Mark mainline, submain, valve, and lateral routes.
- Install the pump connection and control head.
- Lay mainlines and submains with suitable depth or protection.
- Connect valves, pressure regulators, and air release points.
- Install laterals according to crop row spacing.
- Flush pipes before closing ends and attaching emitters.
- Pressure-test zones before regular irrigation begins.
Startup Checks After Drip Irrigation System Installation
Startup should begin slowly. First, open flush points and run clean water through mains and submains. Next, flush laterals until water runs clear. Then close ends and raise pressure gradually. Measure pressure at the zone inlet and far end. A drip irrigation system installation needs these checks before crop scheduling starts.
Record the first operating data. For instance, note pump pressure, filter pressure difference, zone pressure, and flow meter readings. These values become the baseline. Later, unusual changes can reveal leaks, clogging, valve faults, or pump wear. Clear records make troubleshooting faster and more accurate.
Drip Line Installation and Pipe Layout Details
Lateral layout should match the crop canopy, root zone, and field operations. For orchards, lines often run along tree rows. For vegetables, lines may sit on beds or beneath mulch. Good drip line installation keeps emitters aligned with active roots. It also protects lines from harvest equipment and foot traffic.
Mainlines and submains should support service access. In practice, valves and filters need enough room for inspection. Buried pipes require careful bedding and warning practices where needed. A drip irrigation pipe installation should avoid sharp bends, strained joints, and unsupported fittings. Expansion and contraction also matter on exposed lines.
Emitter Placement for Drip Irrigation System Installation
Emitter spacing depends on plant spacing and wetting pattern. For example, closely planted crops may need continuous wetted strips. Wider crops may need targeted wetting near each plant. A drip irrigation system installation should verify wetting depth during early irrigation. Soil probing gives better evidence than surface appearance.
Subsurface drip needs extra care. Burial depth depends on crop, soil, tillage, and rodent risk. Also, vacuum relief and filtration become very important. Operators should map buried laterals accurately. Repairs become harder when lines sit below the root zone or under permanent beds.
- Keep lateral runs within approved design limits
- Place flush points at practical low ends
- Protect exposed pipes from machinery movement
- Use pressure-compensating emitters where slope demands it
- Map buried lines before cultivation or bed renewal
Testing Drip Irrigation System Connections
Testing confirms whether the field matches the design. First, inspect every valve, fitting, and lateral end. Then run each zone separately and watch for pressure drops. Drip irrigation system connections should stay dry under normal pressure. Leaks waste water and can reduce pressure for downstream emitters.
Flow meters help reveal hidden problems. For instance, higher-than-expected flow can indicate leaks or open flush valves. Lower-than-expected flow can indicate blocked filters, closed valves, or clogged laterals. A drip irrigation system installation should include flow readings during commissioning. Those readings help operators detect changes over time.
Pressure Testing Drip Irrigation Lines
Pressure testing should follow pipe and component ratings. First, isolate a section when possible. Then raise pressure carefully and check joints. Avoid excessive test pressure, because it can damage emitters or fittings. In practice, manufacturer limits and local installation standards should control the test method.
Uniformity checks add another layer of confidence. Measure discharge from selected emitters near the inlet, middle, and far end. Compare those values with expected flow. If variation is high, check pressure, clogging, lateral length, and elevation. Then correct the cause before routine fertigation begins.
Operation, Maintenance, and Troubleshooting
Daily operation should follow crop demand, soil moisture, and weather. First, set irrigation duration from field observations and agronomic targets. Then adjust schedules as crop canopy and climate change. A drip irrigation system installation only performs well when operators maintain it. Design cannot replace inspection and timely cleaning.
Filters need routine attention. Also, lateral flushing should occur after installation, after repairs, and during the season. The interval depends on water quality and emitter type. For example, surface water usually needs closer monitoring than clean well water. Pressure gauges and flow meters show when conditions change.
Common Problems After Drip Irrigation Installation
Clogging is the most common complaint. It may come from sand, algae, minerals, fertilizer reaction, or root intrusion. Leaks can come from poor joints, animal damage, or machinery contact. Meanwhile, uneven pressure may come from wrong zone size, blocked filters, or steep terrain.
Troubleshooting should follow a simple order. First, compare flow readings with the baseline. Next, check filter pressure difference. Then measure pressure at the inlet and far end. A drip irrigation system installation with good access points makes this work easier. Operators can isolate issues without digging large areas.
| Symptom | Likely Cause | Practical Check |
|---|---|---|
| Low zone pressure | Filter clogging | Compare gauge readings |
| High flow | Pipe leak | Inspect wet spots |
| Low flow | Closed valve | Check valve position |
| Dry row end | Long lateral | Measure end pressure |
| Emitter blockage | Particle buildup | Flush and inspect water |
Güneysu Teknik Support for Drip Irrigation Projects
Güneysu Teknik supports growers with practical irrigation design, filtration, water storage, fertigation, and installation services in Turkey. Our company also helps match equipment to crop, water source, and field conditions. A professional drip irrigation system installation can include site assessment, hydraulic planning, material selection, commissioning, and operator training.
Project planning should remain realistic. For example, a greenhouse, orchard, vineyard, or open-field vegetable farm may need different controls. Water storage tanks or reservoirs may also support scheduling when source flow is limited. In contrast, some farms may need pump upgrades before zones can operate correctly.
When Professional Drip Irrigation Installation Adds Value
Professional support helps most on complex sites. Sloped fields, long rows, mixed crops, poor water quality, and fertigation needs add risk. Also, automation requires careful valve wiring, sensor placement, and controller programming. A drip irrigation system installation should suit the farm team that will operate it daily.
A turnkey project should still involve the grower. First, the grower explains crop plans and seasonal work patterns. Then the technical team translates those needs into zones, pipes, filters, and controls. As a result, the installed system fits both agronomy and everyday farm management.
Frequently Asked Questions
How Long Does Installation Usually Take?
Timing depends on field size, pipe depth, water source, and labor access. Small plots may finish quickly. Larger farms need more time for trenching, flushing, and testing.
Can Drip Irrigation Work With Well Water?
Yes, well water can work well when filtration and chemistry are suitable. Still, testing should check sand, hardness, iron, pH, and EC before final design.
Do I Need a Filter for Every System?
Yes, filtration is essential for drip irrigation. The filter type depends on water source and emitter requirements. Clean-looking water can still clog emitters.
How Often Should Drip Lines Be Flushed?
Flush lines after installation, after repairs, and during the season. The best interval depends on water quality and field observations.
Can Fertilizer Run Through the System?
Yes, fertigation is common when equipment and fertilizers are compatible. Operators should use suitable dosing equipment and prevent backflow into the water source.
What Causes Uneven Watering?
Uneven watering often comes from pressure loss, long laterals, clogging, or slope. Measuring pressure and flow usually identifies the main cause.
Should Drip Lines Be Buried?
Buried lines can suit some crops and permanent beds. However, they need better mapping, filtration, vacuum protection, and repair planning.
When Should a System Be Professionally Checked?
Request a check when pressure, flow, or crop wetting patterns change. Also, review the system before adding fertigation or expanding zones.